|
|
Map Scanning and Automatic Conversion
Download the PDF version of the page here.
Compared to manual digitizing, scanning is very quick and less costly. The result of scanning an existing document or map, is a raster image, recording a value of dark or light for each grid cell or pixel of the scan. Due to the raster format, scanned images are not directly useful in the vector GIS. However, the scanned image can be displayed as the background image after georeferencing.
The pattern recognition algorithms have been developed to recognize lines, symbosl and annotations from the scanned image to the vector format. Moreover, editing and translation software, are available to convert to vector format.
The following table illustrates the relationship between pixel scanning resolution or dpi; scale of document and pixel ground resolution.
|
Scanned Documents Examples
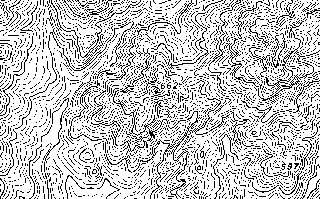
The following image is 1 bit bi-level image. The image contains 0, 1 values. The source of the image is from:
| This is an essential link, you have to visit the web site and download the software. |

0 represents the pixels of contour which are dark in colour. 1 represents the pixel of non-contour which are white in colour. See the following enlarged image. The contour lines can be extracted from this scanned 1 bit bi-level image through semi-automated conversion.

The following image is an 8 bit (256 color) image. The polygon and line features can be extracted from this image through semi-automated conversion or onscreen digitizing.

The following image is an 8 bit grey scale scanned image. The polygon and line features can be extracted from this image through semi-automated conversion or onscreen digitizing.

Practical exercises with R2V
Download the PDF version of hands-on exercises by clicking here. The exercises will demonstrate the automated and semi-automated conversion process. --> Follow the step-by-step instructions.
